Thursday 1 October 2015

Rasgulla (Ricotta Cheese balls in Light Brown Sugar Syrup)

My mother and I simply adore the simplicity portrayed by a famous Bengali dessert called 'Rasgulla'. This cheese dumpling is amazingly versatile to prepare as you can always substitute white sugar with dark molasses kind of sugar to make its light syrup. Apart from that, ricotta cheese is so easy to make at home that leaves fresh  and delicate flavour after one bite. Its a refreshing and tantalizing dessert that will leave you awe after each dumpling. 

         I have no idea about making 'Paneer' or an Indian version of cottage cheese or ricotta chesse until recently I bought a packet of proceed cheese slices from a supermarket. I didn't even bother to check the ingredients on the label but something struck me to check the label. When I went through the ingredients, I came across one particular item called rennet which later I found out to be made of calf's stomach. In retrospect, I was petrified to contemplate that all the while I've been consuming something gross. Well, I'm not a vegetarian but I do avoid eating meat or chicken. Most of the time, my meal consists of vegetables with some fish. 

        I decided to try making ricotta cheese for tiramisu as it's very expensive here in Malaysia. I checked few sites but end up with gayathriscookspot. She has got such a lovely website with varieties of vegetarian cake recipes. She is my inspiration for making cheese but I also made alteration to the original recipe that it no longer has any similarity. Would you believe, if I say, I made the ricotta cheese from full cream milk powder. Now, I can see some of you looking down your glasses or even raising your eyebrow showing disagreement. Trust me, it tasted so good that I didn't find the cheese to be dry but rich and creamy in a good way. I mean it didn't leave oily sensation after taste. I seldom bake or use cheese, heavy cream or whipping cream. Now, this sounds awkward, you may be thinking, is she really from this world. 1/8 cup of good quality unsalted butter made the ricotta cheese full of moisture and a generous cup of thick luscious yoghurt (not sour) rendered the cheese to something soft. 

         Let's check the recipe. I hope you will enjoy this as much I did. Since I'm totally hooked with this ricotta cheese, my mind is thinking how to utilize this gorgeous beauty.


Ingredients :


Full Cream milk powder : 2 generous cups ( do not use instant, please)
Thick homemade curd (use the first day curd not the sour one) : 1 cup
Lemon juice : 1/8 cup
Good quality unsalted butter: 1/8 cup 
Boiling water : 3 cups
Saffron : few strands
Ice cubes : a bowl 
Jaggery or molasses or palm sugar : as much as you want
Water : as much as you want to submerge the dumplings


Method


1. Mix milk powder with 3 cups of hot boiling water and pour this liquid into a heavy bottom pan. At this point, you may add 1/8 cup of butter. Let it come to a rolling boil.

2. Then, gradually, stir in thick curd and lemon juice. Immediately, switch off the stove. The yoghurt and lemon juice will coagulate and curdle the milk. Once you see the milk separating from its whey, now you need to add some ice cubes to stop the cooking process and prevent the cheese from turning rubbery. Ice cubes will retain the softness of the cheese.

3. Pour the entire mixture into a colander that nicely wrapped with cheese cloth or muslin cloth. If you find the mixture in the colander still warm or hot, then add in some ice cubes.

4. Collected whey can be used in many other recipes so you need not discard it.

5.  The soft cheese gathered in the muslin cloth must be drained for lets say overnight tied to a wooden spoon that lay crossed on a big bowl. This process is actually to continue collecting some of moisture in it.

5. The next day, using a spatula, you have to mix and turn the ricotta cheese for 15 minutes until its nice and soft. At this stage, you can add saffron to flavor the cheese. 

6. Shape it into small balls without any cracks which later will expand double in size in the sugar water.

7.Get a wide bottom pan, add molasses or jaggery or palm sugar( as much as you want, I prefer less sweet) and enough water to submerge the dumplings. Let it boil until the sugar dissolves in the water. Check the sweetness at this stage. We are not looking for thick sugar syrup consistency but normal light sugar water.

8. Slowly, slide the dumplings into the sugar water. Make sure they have enough space to expand later. Cover the pan for 5 minutes. Let it cook in the sugar water for another 5 to 10 minutes. The texture of the dumplings will improve the next day, so I advice you to eat after chilling for at least 4 hours. Since this dumpling is made of milk, it has to be consumed within two to three days. 


Happy Cooking


-Abby


Monday 8 June 2015

Moist Banana Cake

This is a very moist and buttery kind of cake. An excellent treat for evening tea or morning breakfast. Well, extra fat and sugar will definitely require you to spend more hours in gym to burn those stubborn fat but it's okay, when taken in moderation or once in a blue moon. Enjoy!

Moist Banana Cake

Ingredients : 


Pillsbury Atta Flour or Chapati flour : 1 cup plus 1 tbsp
Brown castor sugar : 1/4 cup
Mashed ripened bananas : 1 cup
unsalted butter : 125 gm
Vanilla essence : 1 tsp
Eggs (Grade B) : 2
Fresh unsweetened thick milk : 2 tbsp
Baking powder : 1/2 tsp
Baking soda  :  1/2 tsp
Salt : 1/4 tsp

Method :


1. Leave the butter and eggs be at room temperature before we start the baking process.
2. Now, using a hand mixer cream the softened butter and castor sugar till pale colour and without the specks of sugar.

3. Gradually add beaten eggs little by little by beating simultaneously. Do not add eggs all at the same time as it will curdle butter mixture.

4. Mix dry ingredients such as flour, leavening agents and salt. Sieve them thrice.

5. You may start adding mashed banana alternated by flour mixture. Mix it well. This time vanilla essence and milk can be incorporated.

6. Pour the batter in a baking pan and tap it lightly on the ground twice to even the top.

7. Bake at 180 degree Celsius for 40 minutes or till you get a nice brown spot on top and when inserted with a skewer, it comes out clean. Then, the cake is baked well. 

8. Leave the cake on a rack before cutting into slices.


-Abby

Tuesday 7 April 2015

Karuppatti Aapam (Palm Sugar Pancake with Coconut Milk Sauce)


An  effortless way of making aapam or Indian style of fermented pancake. Most of the ingredients you can find in your  pantry except for sour dosa batter which I will post the method of making later. Enjoy!


Karuppatti aapam

Pan


Ingredients for aapam or pancake :

Grated fresh white coconut : 1 cup
Sour dosa batter : 2 cups
Rice flour : 2 cups
Karuppatti (Palm sugar) : 1/2 -1 cup (depends on how sweet you want your pancake to be)
Salt :  1/2 tsp


Ingredients for making salted coconut milk:

Freshly grated coconut : 1 cup
Hot water 
salt : 1/2 tsp 

Method :


1. Grind the grated coconut, dosa batter and rice flour with 1/4 cup of water or little bit more till become smooth paste ( You should not add a lot of water. This batter has to be thick at this stage.)

2. Now mix 1/2 tsp of salt with the aapam batter and let it ferment overnight. You can keep the closed batter in a dry place outside. (Do not keep in refrigerator during fermentation process) 

3.The next morning, you can prepare palm sugar syrup by boiling it with 3/4 cup of water till well dissolved and slightly thick. Strain the impurities left at the bottom of the sugar syrup. Let it cool completely (You can also prepare sugar syrup prior to making aapam in the morning).

4. Mix palm sugar syrup with fermented pancake batter (You need not add all the syrup, taste the batter while mixing it in). At this stage, you need to add water to make it slightly a loose batter but not watery.

5. Extract coconut milk by using freshly grated coconut and hot water. We want to obtain semi thick milk so adjust the water quantity. Mix salt. This is the sauce for the pancake. It's an unsweetened coconut milk sauce.

6. For making this pancake, a special kind of wide and hollow pan with two handles at sides is needed. Add, 1/2 tsp of oil into the pan and wipe it of lightly using a tissue. First scoop a ladle full of batter and start swirling around ( If the batter is too thick, you may not able to swirl well.So keep the batter loose but not watery) . Keep the flame on low. You will notice it has a shape of a round boat. This pancake once cooked will loosen sides indicating time to remove it from the heat.

7. Drizzle generous amount of salted coconut milk on it before serving. If you can't find this type of pan, then you can make conventional pancake but thinner perhaps. 


-Abby

Wednesday 1 April 2015

Drumstick Mild Soup (Murungakai Soup)

Drumstick vegetable is high in vitamin C, and a good source of potassium, magnesium, dietary fiber and calcium. Because it has abundant fiber, the cooked pulp when blended to a smooth paste will have similar texture of collagen. So, it's important to dilute more water when making soup with this type of vegetable. At home, we prefer to slurp the thick, jelly sort of soup as it is so comforting during the cold or rainy season. You can find this vegetable in Indian store or market. Instant energy can be gained through this soup.


Drumstick soup

Drumstick


Ingredients :

Drumstick or murungakai (flesh) : 1 1/4 cup
Drumstick boiled water plus extra water : 3 cups
Green chillies : 1- 2 
Big ripe tomatoes : 2 
Cinnamon : 1 stick
Star anise : 1
Cloves : 5
Fennel seeds : 1/2 tsp 
Whole black peppercorns: 1 tsp
Turmeric powder : 1/4 tsp 
Asofetida : a pinch
Salt :  as needed 
Coriander leaves : for garnishing


Method :

1.Boil the chopped and washed drumsticks of 3 inches in water. After, the outer part is slightly soft, you may scope its flesh out. Grind the flesh with little water to a smooth paste. Do not discard the water as it will be the flavorful stock for our soup.

2. In a heated pan, pour two teaspoons of oil, start tempering the cinnamon, whole black pepper, cloves, star anise and fennel seeds until light brown and immediately add green chillies, asofetida and diced tomatoes with some salt. Fry the tomatoes until mashed.

3. Now, add drumstick paste, its water and more water depending on the consistency that you prefer. Followed by turmeric powder. By the time you add the drumstick paste, soup will become thick like jelly but not to worry you can add more water or reduce the amount of that paste. That paste is full of nutrient for your body.

4. Serve hot as it is.


-Abby

Friday 27 February 2015

Red Coconut and Sesame Seed Chutney

This chutney is commonly served with thosai, idli, vadai or any deep fried savory snacks. You can easily find this type of chutney when you visit any of the South Indian restaurants. This  chutney along with Green chilli coconut chutney and sambar are popular dipping for Indian breakfast type of food. It's fresh, spicy and salty with extra zing that comes from raw small red onions. By adding two tablespoons of toasted white sesame seeds infused the nutty fragrance and enhance the flavor of fresh coconut. A cup of grated coconut seems to be a lot but it is a crucial component in this recipe as it gives dept and richness. Furthermore, its a kind of dipping you could prepare in jiffy.

Red Coconut and Sesame seed Chutney


Ingredients :


Grated fresh white coconut : 1 cup
Small red onions : 8
Tamarind paste : 1/4 tsp
White sesame seeds : 2 tbsp (toasted till golden brown in a heated pan without oil)
Asofetida or hing or perungaiyam : 1/4 tsp
Mustard seeds : 1 tsp
White urad dal: 1 tsp 
Curry leaves : a sprig
Dry red chilli : 9
Salt :  as needed


Method :


1. Grind the grated coconut, 8 dry red chillies, 8 small onions, asofetida, tamarind paste, salt and toasted sesame seeds by adding little water. The consistency has to be a bit loose but not watery and good enough for dipping. Make sure you process the mixture to a smooth paste. If using chunk of asofetida, then fry it in a little oil before grinding along with coconut mixture. 

2. In a heated pan, pour 1/2 tbsp of oil, start tempering the mustard seeds until you hear the crackling sound and then followed by add urad dal. Fry the urad dal till golden brown and immediately add one dry red chilli and curry leaves.

3. Pour the fried ingredients into the ground paste. Mix well and check whether the seasonings are perfect. If it is too thick, add water.

4. Serve this chutney with thosai, idli, pakora or any fried savory snack items. 

-Abby

Thursday 26 February 2015

Eggless Pineapple Custard Jelly


Enjoy this wonderful and cooling dessert. Use only fresh fruits such as pineapple, strawberries or peaches. This recipe is using minimal sugar you may add more according to your preference.

Bon Appétit !


Eggless Pineapple Custard Jelly

Ingredients :


Plain jelly Stripes: 1/4 cup (cut into small pieces and measure)
Fresh ripe pineapple : 1 cup
Brown caster sugar : 3 - 4 t tbsp (or more)
Salted butter : 1 tbsp
Water : 3 cups
Unsweetened evaporated milk : 1/2 cup
Vanilla extract :  1/2 tsp

Method :


1. First, soak the plain jelly strips in a sufficient water for an hour.
2. Then, boil the squeezed jelly strips in 3 cups of water until the jelly strips dissolved.

3. While waiting for dissolving process to finish, you may proceed by melting salted butter and some brown sugar till lightly caramelized. 

4. Now, mix the cubed pineapples and saute for 10 minutes.

5. After, jelly strips dissolved completely, you may add 1/2 cup of evaporated milk. Let it come to boil. Switch of the stove. 

6. Lastly, add 1/2 tsp of vanilla essence and pineapple mixture. Give a good stir.

7. Pour the jelly in a preferred mould and chill before serving.

-Abby

Tuesday 10 February 2015

Green Chilli Coconut Chutney (Dipping for thosai, vadai and idli)

This green chilli and coconut chutney is a basic culinary skill that should be mastered by all in their household. It is essential for Indians to serve chutney as a condiment for thosai, idli or flat-bread or even fried savory snack items. This type of chutney is considered to be fresh since not much of cooking is done on stove. Infact, raw and wholesome ingredients such as grated white coconut and green chillies are acting as a natural antiseptic promoter and the tempering ingredients will be able to enhance our digestive system. Therefore, it is always great to serve this fresh on the same day and you may even garnish the chutney with some coarsely chopped fresh cilantro or coriander leaves.


Green Chilli Coconut Chutney


Ingredients :

Grated fresh white coconut : 1/2 cup
Green chillies : 2 
Ginger : 1 1/2 inch piece
Roasted gram dal (Pottukadalai) : 1 tbsp
Asofetida : 2 pinches
Mustard seeds : 1/2 tsp
White urad dal: 1/2 tsp 
Dry red chilli : 1
Salt :  as needed


Method :

1. Grind the grated coconut, green chillies, small piece of ginger and roasted gram dal to a smooth paste by adding little water. The consistency has to be a bit loose but not watery and good enough for dipping. 

2. In a heated pan, pour two teaspoons of oil, start tempering the mustard seeds until you hear the crackling sound and then add urad dal. Fry the urad dal till golden brown and immediately add dry red chilli, asofetida and salt.

3. Pour the fried ingredients into the ground paste. Mix well and check whether the seasonings are perfect. If it is too thick, add water.

4. Serve this chutney with thosai, idli, pakora or any fried savory snack items. 


-Abby

Tomato Chutney

I just simply adore the colour of this tomato chutney as I'm always perplexed at how simple and minimal ingredients could turn a condiment to a tasty and fresh finger licking relish. The best part of making chutney is effortless concept adapted to ones satisfaction. What more you could ask for. I cannot resist this magical tempering ingredients that once start spluttering in the hot oil release the authentic Indian food aroma. I don't prefer to add tamarind for my chutney as it gives a kind of artificial sourness so you can always add two or three tomatoes if they are medium in size. 

Tomato Chutney


Ingredients :

Red onion (big) :1
Large Ripe tomato : 1
Curry leaves : 2 sprigs
Asofetida : a pinch
Mustard seeds : 1/2 tsp
White urad dal: 1/2 tsp 
Dry red chillies : 3 (This is spicy, I warn you but you could go slow with 1 or 2 )
Salt :  as needed 

Method:


1. In a heated pan, pour a tbsp of oil, start tempering the mustard seeds until you hear the crackling sound and then add urad dal. Fry the urad dal till golden brown and immediately add dry red chilli, asofetida, curry leaves and salt. No need to fry the red chillies too much otherwise you will end up with burnt chillies. 

2. Now, chuck in diced onions, saute them till translucent. Then gradually add in diced tomato and keep stirring till the tomato is nicely mashed. Switch of the flame.

3. Pour the fried ingredients into a liquidizer. Blend it to semi- smooth consistency by adding little water at a time. I like my chutney to have tiny bits of urad dal and mustard giving that nutty texture but you may also grind it to smooth paste. Do as per your liking.

4. Serve this chutney for thosai, idli, pakora or any fried savory snack items. 


-Abby

Thursday 5 February 2015

SPICY Guilt free steamed dumpling (kara pidi kolukattai)


These dumplings are easy to prepare with minimal ingredients that you can always find stored in your refrigerator. Plus, no deep frying with immersed oil dripping all the way through the food that sometimes leaves us with a sudden sense of guilt and repentance. This dumpling recipe is spicy and doesn't even need any condiment to dip. For me it's a worth trying dish not because I'm posting it here on my blog. Enjoy.


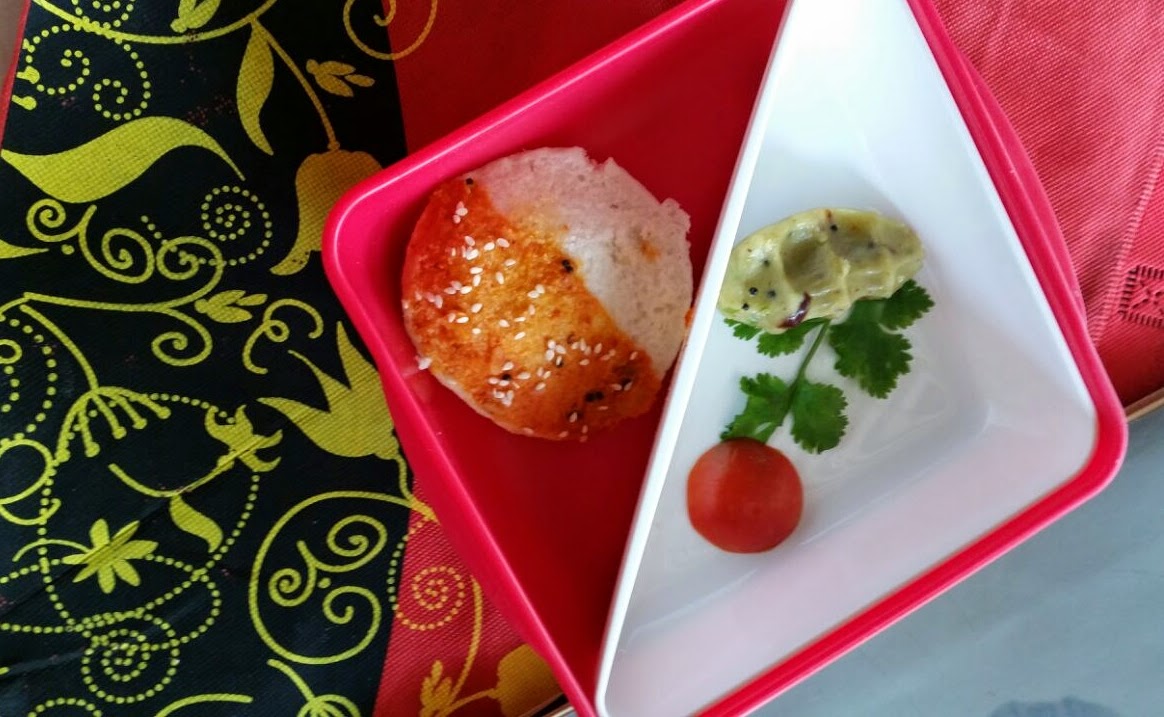
From the left to right : Idli and spicy steamed dumpling (kara pidi kolukattai)


Ingredients :

Rice flour or Idiyappam flour (can get it from any Indian stores) : 1 cup
Yellow moong dal (the one without skin) : 1 tbsp (soaked for 2 hours) 
Green chillies : 4 (I f you can stand the heat)
Grated coconut : 1/4 cup
Fresh ginger :  1 1/2 inches
Asofetida or hing :  a pinch (optional)
Mustard seeds : 1/2 tsp
Cumin seeds : 1/2 tsp
Dry red chillies : 1 (remove the seeds and nick it to small pieces)
Indian sesame oil or any cooking oil : 1/2 tbsp
Boiled water : as needed
Salt : as needed

Method :

1. Grind the green chillies, grated coconut, asofetida, ginger piece and salt by adding little water to form a smooth green paste. 

2. In a heated pan, pour 1/2 tbsp of oil and start tempering the mustard seeds till they sputter and gradually add in the cumin seeds, dry red chilli. Start mixing the blended green paste with 1/8 cup of water. Let it boil for 5 minutes to get rid of the raw chilli smell.

3. After that, switch off the stove. To the same pan, add a cup of rice flour and start mixing green paste, flour and add the soaked yellow moong dal together. At this point, water may not enough so you will need to add only boiled water to form a non sticky pliable and smooth dough.

4. You may shape the dough into desirable patterns or round balls. Steam the balls in a steamer for a good 15 - 20 minutes.

5. Serve hot as it is or with chilli sauce.

-Abby

Tuesday 3 February 2015

Spicy Indian Omelette (Pure Vegetarian)

I love egg omelette but being vegetarian on certain days, this lentil based pancake or omelette makes my day perfect. It has all the nutrients and most importantly taste good without additional non-vegetarian items. It is an easy to prepare dish with aromatic herbs added as a  digestion improver and give a nice blend of flavor. Fermentation is not required when making this thick batter. But do not leave the batter outside as it has the tendency to turn sour and always keep the leftover batter in the fridge. I recommend you to use as much lentils as you want to make on that day and keep the extra soaked lentils in the fridge and you can use it again on the next day or you could even make pakora or deep fried lentil batter out of it. Always add the finely chopped onion when you are ready to make the omelette.

Spicy Indian Omelette


Ingredients :

Green Moong dal(with skin) : 1/2 cup
Raw rice : 1/4 cup
White soya bean : 1/8 cup
Toor dal (Pigeon eye dal) : 1/8 cup
Asofetida or hing : 2 pinches (optional because we already use saunf or fennel seeds)
Medium sized onions :2
Coriander leaves : 1/4 cup (Finely chopped)
Curry leaves : 4 sprigs


Ingredients to grind into smooth paste :

Dry red chillies : 6 (adjust accordingly, I prefer spicy)
Fennel seeds : 2 tsp
Cumin seeds : 1/2 tsp
Fresh turmeric :1 inch piece
Salt : as needed 

Method :

1. Soak dal and beans in a sufficient water for overnight.

2. After 9 - 10 hours, drain off excess water in a colander.

3. Grind all ingredients mentioned under 'Grind' section to smooth paste by adding enough water. Its okay if there are small particles of fennel and cumin seeds, I call that rustic way of cooking and it adds some kind texture to the omelette. Well, its an excuse for my hasty way of cooking.

4. Now, add drained beans and dal to the red paste and start pulsing the liquidizer after short run. You must add water little by little and turn the paste to coarse one. Do not make smooth paste as the omellete will be way too soft with no crispiness. The coarse paste is similar to the one when you make masala vadai. That means you can still see small bits and pieces of dals here and there. I would say 70 percent coarseness. 

5. No fermentation required here. 

6. Finely chop the onions, curry leaves and coriander leaves. Add all to the beans and dal mixture with salt if needed and 2 pinches of asofetida. 

7. Add enough water to make semi thick batter. Heat a flat pan, and take 1 small stainless steel bowl of batter and start swirling on the pan's surface forming a uniform circle which has to be slightly thin. Add Indian sesame oil or any cooking oil at the sides of the omelette and also on top of it. 

8. We are looking for nice brown crust at bottom and top of the omelette. Turn to the other side and cook till it's light brown and crispy. 

9. Unlike thosai, this omelette a.k.a pancake cannot be swirled smoothly and flawlessly because of the semi thick and coarse batter. You will have to struggle here but practice makes perfection. By adding oil to the bottom of the swirling bowl, you can swirl better.

10. Serve hot with green chilli and coconut chutney.

-Abby

Thursday 29 January 2015

Andhra Special Bhagara Baingan (Eggplant in Peanut Sauce)

There are various Bhagara Baingan recipes on net and this cuisine is a specialty of Hyderabad but I find my recipe to be appealing. However, I will not be able to assure you with the authentication of this cuisine as I have altered the recipe according to my taste bud and flavor. The dominant flavor of white cumin seeds tends to put me off so I replaced it with shahi jeera or black cumin seeds. Apart from that, I thought adding aromatic spices such as cinnamon, star anise and clove would elevate the flavor of this eggplant dish to another level. Blending these spices with coriander seeds and lots of dry red chillies add more appetizing colour and compensate with the richness from the peanut and sesame seeds. The sourness promoted by the tomato and tamarind also help to revoke the richness of the peanut sauce dish. This dish is best served with Kuska biryani or plain biryani or Naan flat bread.

Eggplant in Peanut Sauce


Ingredients :


Big red onion : 1
Medium ripe tomato :  1
Green chillies : 4
Small eggplants (round) : 11
Tamarind paste : 1/2  tsp 
Ginger garlic paste : 1 tbsp
Turmeric powder : 1/4 tsp
Oil : for deep the eggplants
Palm sugar : 1 tsp (optional)
Salt : as needed


Chilli- Peanut Paste : (dry roast and grind to smooth paste by adding water)

Dry red chillies: 5-6 ( adjust accordingly)
Coriander seeds: 1 1/4 tbsp
Grated coconut : 3 tbsp
White sesame seeds : 3 tbsp
Raw peanuts (without skin) : 3 tbsp
Fenugreek seeds : 6
Star anise : 1
Cloves : 3
Cinnamon : 1/2 inch piece
Cumin seeds : 1/2 tsp
Fennel seeds : 1/4 tsp


To Temper :


Cooking oil : 3 tbsp
Black cumin seeds : 1/2 tsp
Bay leaf : 1


Method :

  1. Dry roast the ingredients under 'Dry Roast' section till light golden brown in a pan. You can fry peanut and sesame seeds separately without oil. Grind them with enough water to a smooth paste. 

2. Finely chop the onion and tomato. Slit the green chillies and extract tamarind paste. 

3. Make four intersections to the eggplant starting from the smooth bottom of it till you reach the stem of the eggplant without cutting through it.. This is to allow the peanut paste to infuse all flavor into the fried eggplant. Deep fry the eggplants with added salt till golden brown. Drain the fried eggplants into a plate with absorbent paper.

4. Add oil into heated pan, temper all ingredients under 'To Temper' section. Then start adding finely chopped onion and slitted green chillies. Fry till onion is translucent and slightly brown in color. 

5. Next, add finely chopped tomato and salt. Fry till tomato is mashed. Now, you may add peanut paste, 1/2 tsp tamarind paste, 1 tsp jaggery, 1/4 tsp turmeric powder and enough salt. 

6. Add enough water, and fried eggplants, cook them on low flame for 15-20 minutes till the eggplant is cooked well and reach the consistency of gravy you prefer. Garnish 3 tbsp of coriander leaves. This gravy should not be too watery or thick.

7. This gravy is tasty with flat breads, biryani or plain rice. 

-Abby

Tuesday 13 January 2015

Indian Style of Spicy Ginger Sauce ( multi-purpose just like chilli ketchup)


I stopped using tomato ketchup or chilli sauce after finding a great alternative. Ginger sauce has all sort of Indian spices that works well as a condiment for fried fish fried chicken, burger, samosa etc. Plus it has long life storage too without preservatives. Give a try.

Indian Style of Spicy Ginger Sauce

Ingredients :


Young ginger (chopped) : 1 1/4 cup
Tamarind paste : 1/2 cup
Palm sugar :  1/8 cup to 1/4 cup ( I've used only 1/8 cup as I don't like sweet pickle)
Garlic cloves : 1/2 cup
Turmeric powder : 1/2 tsp
Chilli powder mix : 1/2 cup
Salt : 1/4 cup 


Chilli powder mix for the pickle : (dry roast and grind to fine powder)

Dry red chillies: 20
Coriander seeds: 1 1/2 tbsp
Fenugreek seeds : 1/2 tsp


To Temper the pickle :


Indian sesame oil : 1 cup
Cumin seeds : 1 tsp
Mustard seeds : 1 tsp
Dry red chillies : 3
Curry leaves : 3 sprigs
Garlic cloves (chopped roughly) : 10 

Method :


1. Dry roast the ingredients mentioned above the 'Chilli powder mix for pickle' section lightly and grind them to fine powder. Keep that aside.

2. Boil one big lime size of tamarind along with 1/2 cup of water for 5 minutes till soft. Remember to discard the tamarind seeds if available. Let the liquid cool at room temperature.

3. By adding 2 tsp of cooking oil, saute 1 1/4 cups of chopped young ginger till golden brown. This process is a must to get rid of the raw smell of ginger. Keep aside.

3. Next, by adding 1 cup of Indian sesame oil to the heated pan, temper ingredients under 'Temper' section. 

4. Now, in a blender, add 1/2 cup of chilli powder mix, boiled tamarind and its liquid, turmeric powder, palm sugar, 1/2 cup garlic cloves and 1/4 of salt. Blend to smooth red paste and add little bit of boiled water if the consistency is way too thick but not watery. 

5. Add the tempered ingredients and its oil and mix till well incorporated. Store the sauce in a clay pot jar or sterilized jar with air tight lid. The sauce will mature or ferment as it ages. The sauce serves in various way especially as a condiment for Indian flat bread, rice, biryani and burger. This sauce if well kept will last for 1 year. That's why we should not reduce the amount of oil used here. Use only dry spoon to take the sauce from the bottle. Always keep in the refrigerator for longer use.

Quick Home-made Khoya Gulab Jamun ( Mini Milk Cake Balls in Palm Sugar Water)


This gulab jamun recipe was adapted from http://nishamadhulika.com/en. I find the jamun recipe to be simple and easy to prepare when you don't have khoya in hand. Nisha has given us detailed explanation on how to prepare instant khoya at home using milk powder and full cream milk. I didn't follow the recipe to the exact amount given but altered here and there as my first attempt of making jamun using the same amount was a disaster. I alleviated the butter and sugar amount. A lot of people said you could never make gulab jamuns sugar water by using jaggery or palm sugar but when I made using that ingredient, I didn't even suspect the difference. Making jamuns with cooked milk is a divine pleasure it has the creamy, milky and buttery texture that simply melts in your mouth. Every bite is a great experience and definitely it makes you to devour more.


Gulab Jamun


Ingredients for making Gulab Jamun Dough (using Fernleaf, New Zealand Full Cream Milk Powder) :

Full Cream milk powder : 1 cup plus 1/8 cup
Full Cream milk or evaporated milk : 1/2 cup
Ghee or clarified butter : 1/8 cup
Whole Wheat Pastry flour : 4 1/2 tbsp
Yoghurt (Not the sour one) : 4 tsp (depends on the moisture of the mawa)
Salt : a pinch

Method

1. In a heated pan, add 3 tbsp to 4 tbsp clarified butter along with 1/2 cup of milk. Let it boil for 5 minutes. 

2. Then, gradually add in the milk powder, little at a time by stirring continuously.

3. Keep stirring till the milk dough comes together as a ball. While stirring you can lightly press the dough to smooth any lumps and most of the liquid must be absorbed through mixing. If you find the 1/2 cup of milk too little for 1 cup of milk powder, then you may add little milk while stirring or had you find the 1 cup of milk powder to be not enough for the 1/2 cup of milk, then add few tbsp of milk powder. This is actually to ensure the formation of a dough. 

4. This is what we call 'Instant Mawa or Khoya'. Let it cool at room temperature and later keep in the refrigerator for 30 minutes.

5. You may find the mawa to be harden after keeping in the fridge. Do not have any qualm. Crumble it to breadcrumbs texture by using the tip of your fingers.

6. Now incorporate the whole wheat pastry flour to the crumbled mawa along with a pinch of salt. Little at a time mix the yoghurt. Bring the mixture to a smooth, pliable and unsticking consistency ( You have to decide the amount of yoghurt based on your mawa plus ww flour mixture). Don't knead the dough for a long time as it will make the gulab jamun chewy and hard. Sometimes, you may find cracks appear on the surface of the balls, it is because of not enough of moisture so don't hesitate to add little yoghurt.

7. Let the dough rest for 15 minutes. After that, pinch a small dough and roll it gently on your palm without adding much pressure to the dough. You need to coat your palm with some ghee to help you shape the balls. 

8. You need sufficient oil for deep frying the balls. Keep the flame on very low, add only four balls at a time and fry till deep brown color. Never increase the flame or crowd the wok with lots of balls as they may crack. Drained and collected balls are laid on a plate with oil absorbent tissue.


Ingredients for making Palm Sugar Water:


Jaggery or Vellam or Palm Sugar : 1/4 cup plus 2 tbsp
(I used very little amount of sugar as I have no preference for overly sweet dessert but you may add more according to your taste bud. When you add more sugar, then you have to increase the water level as we are trying to achieve not syrupy consistency but sugar water for soaking the balls)

Hot water : 1 cup
Cardamon pods : 6 (crushed)
Rose essence : a few drops

Method

1. In a heavy bottomed pan, add 1 cup of hot water, palm sugar and crushed cardamon pods. Boil it gently for 15 minutes. Cool the sugar water to room temperature. (If using jaggery or palm sugar then, you may need to strain impurities in the sugar water)


How to assemble the Gulab Jamun in Sugar water :

1. Use wider dish, assemble the jamuns on a shallow dish. By using a ladle, gently pour sugar water on the assembled jamuns. You may not need to use all the sugar water but only use some to drench on the jamuns. Lots of liquid will over soak them or over sweet them and they will break easily.

2. Keep it in the refrigerator. Serve gulab jamuns with vanilla ice cream.

Spicy Vegetable Biryani

  Spicy Vegetable Biryani INGREDIENTS :  Basmati or Seeraga Samba rice - 2 cups Water - 3 1/2 cups Oil - 3 tablespoons Ghee - 2  teaspoons C...