Monday, 22 February 2021

Tiffin Sambar Powder

Hot idlis and tosai straight from the tawa need tasty condiments to go along. Tiffin sambar is our all time Indian favorite to submerge and dunk the idlis and tosai pieces into it. When it is prepared fresh in your kitchen, you can be sure of the quality of the ingredients and hygiene of the the product produced. I prefer to grind small batch of Tiffin sambar powder to retain it's freshness and aroma. Moreover, we don't regularly prepare Tiffin sambar unless it is to be eaten with idlis. Otherwise, we just use chutney as a condiment for Indian varieties of breakfast. You can make ordinary sambar with sambar powder alone, but adding Tiffin sambar powder will definitely elevate the taste and authentic flavor as how it is cooked in Indian hotels. Larger quantities will need to be stored in a refrigerator to prolong its shelf life. 

Tiffin Sambar Powder


INGREDIENTS:

Dry red chilies - 40g

Coriander seeds - 50g

Cumin - 25g

Black peppercorns - 25g

Fenugreek - 25g


METHOD :

1. Dry roast coriander seeds, black peppercorns, fenugreek, cumin seeds individually one by one until they release the spice aroma and hot to touch.  

Image of dry red chilies, peppercorns, fenugreek, coriander seeds and cumin
before roasting(from left)
 

2. Fenugreek has to be dry roasted till it change deep brown color. That gives nice aroma.

3. Dry red chilies has to be sun dried because they tend to get burned when fried in a pan. So, we want to retain the red color of the chilies, but allow them to crisp up so that the spice powder will have longer shelf life.

4. Now, put all the roasted ingredients into a liquidizer and grind into fine powder. Allow the powder to cool a bit in an open air.

5. Store in an air tight container and later refrigerate.

6. We can use homemade Tiffin sambar powder to make Hotel style sambar for idly and tosai. 


Thank you

Abby


Friday, 19 February 2021

Baby Potato Roast

Who doesn't love potatoes be it Russet, Yukon or small varieties. This is an effortless and scrumptious recipe using minimal ingredients and the star is the 'BABY POTATO. I prefer simple recipes that doesn't require strenuous effort in preparing, cutting and cooking the dishes. Well, sometimes, the authentic recipes need more exquisite details, ingredients and care. But when you are in a hurry, recipes like this can be a time saver, and if you aren't a picky eater than you eat it with rice, chapati or even bread. You can halve the potatoes when taken with rice or mash them nicely if you want to spread on a slice of  toasted bread. This recipe is just an idea for you improvise and make the best use of potatoes. 

Baby Potato Roast


INGREDIENTS :

Baby potatoes -16
Medium sized red onion  -1
Garlic cloves  -3
Ginger   - 1 inch
Green chilies  - 1 to 2
Chili powder  - 2 tsp
Turmeric powder - 1/2 tsp
Lime juice   - 1 tbsp to 2 tbsp
Chopped coriander leaves   - 4 tbsp
Salt             


To Temper :

Fennel seeds         - 1 tsp
Urad dal                - 1/2 tsp       
Vegetable oil          - 3 tbsp


METHOD :

1. Wash the potatoes to remove any dirt and boil them in a water added with salt and turmeric powder. 

2. After cooking the potatoes, drained them in a colander and peel off the skin. Keep it aside.

3. Heat up a pan and add 3 tablespoons of oil. When it is hot, add items under 'TO TEMPER'. By now, if you are familiar with my blog and cooking style, I prefer the urad dal and fennel to change color into slightly golden brown. 

4. Then, immediately, add finely chopped onion, chopped green chili and crushed ginger-garlic. Sauté the onion until translucent and the ginger-garlic until there is no raw smell.

5. Now, add boiled and peeled potatoes, along with chili powder, a lavish sprinkle of chopped coriander or cilantro leaves and salt (I prefer to be generous with cilantro as it gives the nice earthy perfumery smell). Fry them until you start seeing the oil oozing around the potatoes. You will need 10 minutes to fry this into a dry roast. We don't have to add any water, but just keep an eye on it as you don't want it to burn. So keep stirring from time to time. 


6. Lastly, after switching off the flame. You have to add 1 tablespoon of lime juice. If you like extra spicy and tangy, just go a head and increase the green chilies and lime juice. I would say, you have to taste in order to adjust the spice level accordingly. 

7. Serve this dish with piping hot rice, as a sandwich spread or side dish for chapati. 


Thank you

Abby

Monday, 15 February 2021

Sundakkai Pachadi / Turkey Berry Dhal Curry

Sundakkai in Tamil and in English we called it as Turkey berry. It is a popular hearty plants that thrives in variety of climates, but it grows best in sunny temperate regions. This plant is widely eaten and used in Asia and India for it has high medicinal values. By consuming Turkey berry regularly will help to combat digestive problems and bacterial infections in our gut system. Moreover, just like spinach this plant help to cure low iron deficiency that may cause fatigue, dizziness and shortage of breath. It is one of the vegetables that provides adequate iron and prevents anemia. Besides that, eating Turkey berry is one of the natural ways to lower your blood pressure and protects you from heart disease or stroke. Malaysians, Thai and Indians use fresh Turkey berry in their savory dishes while the dried Turkey berry is used in Indian spicy tangy curry. It is believed that dried ones are really effective in killing bacteria in your gut and promote healthy digestive system. The only down turn of this plant is that you may need to put some effect to cut the tiny berries into halves which sometimes may seem time consuming for busy women. It is a plant that has lots of tiny little seeds just like the eggplants and tomatoes, plus it has a bit of tartness and slight bitterness. When considering its health benefits one should never be offended by the extra preparation and unusual taste it contributes to. We quite often cook Turkey berry at home using dal and tomatoes, and it goes well with rice and chapati. We are used to the taste and texture of this berry. I thought of sharing this dish with all the viewers and I hope you would buy and cook Turkey berry. 

Sundakkai Pachadi/Turkey Berry Dhal Curry

 INGREDIENTS: 

Sundakkai/ Turkey berry - 300 g
Medium sized red onion - 1
Medium sized ripe tomatoes - 4
Toor dhal or lentils  - 1 cup
Green chilies - 3 to 4 
Fish curry powder -  1 tbsp
Turmeric powder  - 1/4 tsp
Asafoetida  - 1/4 tsp
Curry leaves - a sprig
Coriander leaves - handful
Mustard - 1 tsp
Urad dal- 1/2 tsp
Fenugreek - 1/2 tsp
Salt

METHOD:

1. First, rinse toor dhal three times until the water is clear and allow it to soak in the clean water for half an hour. 
Toor dal or Toor lentil


2. Then, cook the drained toor dhal with 3 cups of water by adding 1/4 tsp of salt and turmeric powder. Allow the dhal to cook until it's nice and soft. when cooking dhal, you may sometimes find your water boiling really high that it may come to the surface and start over flowing from the pot, so to avoid that, you may need to add a teaspoon of vegetable oil. 

3. Dice the onion finely, slit the green chilies and cut the tomatoes into small chunks. Keep that aside.
Diced onion, tomato chunks and green chilies that are slitted


4. Remove the stems and halve the Turkey berries and drop them into a bowl with water. When you halve the berries, do inspect for any black spots or insects, if you find any discard that. 
Fresh Turkey berries with stems


5. After halving all the berries. Rinse the cut berries thoroughly. 

6. Add a tablespoon of vegetable oil to the pan. When the oil is hot, you need to lightly sauté the berries until the outer skin of the berries shrink slightly and changes color. This is done for 5 minutes to remove the raw smell of it. 
Lightly sauté the berries


5. Again heat a clean pan with 2 tablespoons of vegetable oil. After the oil is hot, add mustard seeds, urad dhal and fenugreek. Fry them until mustard sputters, urad dhal and fenugreek are brown in color. You must make sure the mustard seeds really pop out, and that's when you get that nice aroma. 

From left : Mustard seeds, fenugreek, urad dhal and asafoetida (available in any Indian grocery)


6. At this stage, chuck in diced onion, green chilies, tomato chunks and curry leaves. Sauté them all until the onions are translucent and tomatoes are slightly mushy. 


7. Now, you can add all the spice powder like turmeric, fish curry powder and asafoetida. Give a quick mix and add cooked dhal and it's water. 
Sautéed berries with the spice powder 


8. Allow the gravy to slightly thicken and boil for 10 -15 minutes and don't forget to add salt as per your taste. I prefer to add salt lastly because we can retain the freshness of any vegetables that we cook, and it enhances the color too.  It will be like semi-gravy with the goodness of lentil protein. Finally, chop a handful of coriander and sprinkle to the dhal curry 5 minutes before you switch off the flame. 
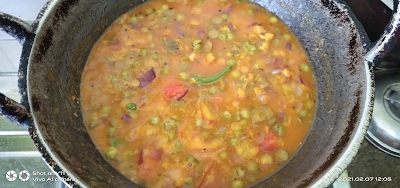
Simmering dhal curry


9. This dhal curry is apt as a side dish for chapati and piping hot rice.


Do give a try and if you have any questions, drop me a comment. It would be my pleasure to help you. 


Thank you

Abby 

Wednesday, 10 February 2021

Stir Fry Amaranth leaves -Indian Style

Amaranth leaves are leafy green from the Amaranth plant. It is widely grown and eaten in Africa, Asia and Caribbean. It is also becoming popular in USA as it contains many nutritional values. Amaranth leaves are a good source of potassium which help to move more oxygen to the brain that stimulate neural activity and cognitive function thereby reduce the risk of stroke. Besides that, it is also a boon to women and girls who have iron deficiency as it is packed in iron. Since Amaranth leaves have dietary fiber, they aid in digestion and constipation. Comparatively, this type of leafy green is better to other kinds such as Kale as you can easily make a raw salad out of it without cooking much. The texture and appearance of this leafy green is very similar to the spinach so it is a versatile green where you can opt a wide range of cooking option from raw salad, soup, fry, simmered dish like curry or even fermented or jarred version to be eaten year round, just like the Africans. Lets see how to prepare a stir fry style using Indian spices.


Stir Fry Amaranth


INGREDIENTS: 


Amaranth leaves - a bunch, approximately 6 to 7 cups
Onion                  -1
Dry red Chilies     - 1
Mustard              - 1/2 tsp
Urad dal             - 1/2 tsp
Vegetable oil      - 1 tbsp
Salt                   
Sugar                - 1/4 tsp

METHOD:


1. Before washing the leafy green, do inspect for any insects or white spots, if there are any, discard those leaves. Choose only the fresh and organic ones. Amaranth comes with thicker stems and younger stems. we prefer to use the younger stems for stir fries. The thicker stems can be cut and added while cooking soup or broth. 

2. Now, you have to wash the leaves and stems thoroughly to remove any dirt or sand. Later, drain them off in a colander.

Thoroughly washed Amaranth leafy green


3. After that, cut them finely to ease the cooking process. 

4. Heat a pan, add a tablespoon of vegetable oil or peanut oil. When the oil is nice and hot, add 1/2 teaspoon mustard and urad dal. Allow the mustard to sputter and urad dal to change into brown color. These highlighted steps are really crucial in any Indian cooking as it gives nice aroma to the dish.

Mustard and urad dal


5. Next, chuck in finely diced red onion and dry red chilly (break into half). Once the onion has slightly become translucent, it's time to add the finely chopped Amaranth. 

Onion is being cooked until translucent


6. Don't put a lid to cook the leaves. Cook them for 5 minutes until they are done. Once they are cooked, you can add salt and 1/4 tsp of brown sugar to bring back the vibrant green purplish color of the Amaranth. Sugar really enhances the color and taste of any vegetables when added a little at the end of the cooking process. Serve this dish with piping hot white rice and curry. 


7. Do give a try and let me know if you have any doubt in preparing the dish. 


Thank you

Abby

Saturday, 6 February 2021

Macau Almond Cookies (Gluten Free Cookies)

 For well-nigh 5 years, I have been away from my blog, but cooking has always been my passion, not to say that I am a foodie or that sort, but I believe cooking is one of our many survival skills. The pandemic that hit us recently has taught us the value of cooking at home, it's really a stress buster. Recently, I came across traditional Chinese Macau Almond Cookies, typically popular in Macau an island in Hong Kong. This cookies originated from Canton, China , but prominently sold by hawkers everywhere in Macau. Traditionally, it is baked under the blazing charcoal fire so the cookies have smoky and nutty texture that is achieved by adding almond meal and mung bean flour. It's surprising how amalgamation of a few simple ingredients could contribute to the best effect of the cookies. I have to warn you that this is not your typical buttery, crispy or chewy cookies, but different type of crunchy, dry and gluten free cookies. The best part of this cookies will be the mooncake pattern mould that we use here. I am planning to try different types of Macau Almond cookies recipes to find the best one. This is something that I have tried yesterday at home. We all loved it for it's uniqueness and history.


Macau Almond Cookies


INGREDIENTS :

Salted butter - 25 g - 35g

Raw almonds - 55g

Mung bean flour -50g

Brown caster sugar - 30g

Water - 1 tsp


METHOD:

1. Mix brown sugar and a teaspoon of water in a small bowl to form honey sort of syrup.


2. After that add room temperature salted butter to this concoction and mix till it is a bit pale in color. 


3. Then, blanch the almonds in hot water to remove their skins. The almonds are lightly pan toasted. When you are toasting almonds in a pan, ensure to keep the flame low as you don't want to burn them. Now, grind the toasted almonds into fine powder by pulsing them from time to time. Don't attempt to grind the almonds for a long time because it will tend to become paste. 

toasted almonds 


Almond powder/almond meal


4. Now combine almond meal, mung bean flour into the butter sugar paste. Mix well with your hands. You can buy mung bean flour from the Chinese grocery shop or any Asian or Indian store. I don't believe in making my own as it is time consuming. 
Mung Bean flour packet

Mung Bean flour


5. For shaping the cookies, you will need a mooncake mould. You take a clump of the crumbly mixture and press it with your one hand and add the mixture into the mould. Press the mixture well and give the mould a hard tap on the board to remove cookies easily. I had a difficult time here as it was my first time making these cookies. Mine was breaking into pieces so I intuitively added little bit of butter and tiny drops of water to gather the crumbs together by hand. That's why the amount of butter, I suggested here is around 25 to 35 g. 

Mooncake cookie mould

6. Lay the cookies on a baking tray that is slightly buttered. Preheat your oven to 120 degree celcius for 5 minutes.

7. Bake the cookies at 110 degree celcius for 30 - 40 minutes depending on the thickness of the cookies.

8. My end result was not perfect, but the taste was good. Next time, I would like to make it better. I hope you would try these cookies in your kitchen. Till, then I will post other recipes. 


Thank you.

Abby


Thursday, 1 October 2015

Rasgulla (Ricotta Cheese balls in Light Brown Sugar Syrup)

My mother and I simply adore the simplicity portrayed by a famous Bengali dessert called 'Rasgulla'. This cheese dumpling is amazingly versatile to prepare as you can always substitute white sugar with dark molasses kind of sugar to make its light syrup. Apart from that, ricotta cheese is so easy to make at home that leaves fresh  and delicate flavour after one bite. Its a refreshing and tantalizing dessert that will leave you awe after each dumpling. 

         I have no idea about making 'Paneer' or an Indian version of cottage cheese or ricotta chesse until recently I bought a packet of proceed cheese slices from a supermarket. I didn't even bother to check the ingredients on the label but something struck me to check the label. When I went through the ingredients, I came across one particular item called rennet which later I found out to be made of calf's stomach. In retrospect, I was petrified to contemplate that all the while I've been consuming something gross. Well, I'm not a vegetarian but I do avoid eating meat or chicken. Most of the time, my meal consists of vegetables with some fish. 

        I decided to try making ricotta cheese for tiramisu as it's very expensive here in Malaysia. I checked few sites but end up with gayathriscookspot. She has got such a lovely website with varieties of vegetarian cake recipes. She is my inspiration for making cheese but I also made alteration to the original recipe that it no longer has any similarity. Would you believe, if I say, I made the ricotta cheese from full cream milk powder. Now, I can see some of you looking down your glasses or even raising your eyebrow showing disagreement. Trust me, it tasted so good that I didn't find the cheese to be dry but rich and creamy in a good way. I mean it didn't leave oily sensation after taste. I seldom bake or use cheese, heavy cream or whipping cream. Now, this sounds awkward, you may be thinking, is she really from this world. 1/8 cup of good quality unsalted butter made the ricotta cheese full of moisture and a generous cup of thick luscious yoghurt (not sour) rendered the cheese to something soft. 

         Let's check the recipe. I hope you will enjoy this as much I did. Since I'm totally hooked with this ricotta cheese, my mind is thinking how to utilize this gorgeous beauty.


Ingredients :


Full Cream milk powder : 2 generous cups ( do not use instant, please)
Thick homemade curd (use the first day curd not the sour one) : 1 cup
Lemon juice : 1/8 cup
Good quality unsalted butter: 1/8 cup 
Boiling water : 3 cups
Saffron : few strands
Ice cubes : a bowl 
Jaggery or molasses or palm sugar : as much as you want
Water : as much as you want to submerge the dumplings


Method


1. Mix milk powder with 3 cups of hot boiling water and pour this liquid into a heavy bottom pan. At this point, you may add 1/8 cup of butter. Let it come to a rolling boil.

2. Then, gradually, stir in thick curd and lemon juice. Immediately, switch off the stove. The yoghurt and lemon juice will coagulate and curdle the milk. Once you see the milk separating from its whey, now you need to add some ice cubes to stop the cooking process and prevent the cheese from turning rubbery. Ice cubes will retain the softness of the cheese.

3. Pour the entire mixture into a colander that nicely wrapped with cheese cloth or muslin cloth. If you find the mixture in the colander still warm or hot, then add in some ice cubes.

4. Collected whey can be used in many other recipes so you need not discard it.

5.  The soft cheese gathered in the muslin cloth must be drained for lets say overnight tied to a wooden spoon that lay crossed on a big bowl. This process is actually to continue collecting some of moisture in it.

5. The next day, using a spatula, you have to mix and turn the ricotta cheese for 15 minutes until its nice and soft. At this stage, you can add saffron to flavor the cheese. 

6. Shape it into small balls without any cracks which later will expand double in size in the sugar water.

7.Get a wide bottom pan, add molasses or jaggery or palm sugar( as much as you want, I prefer less sweet) and enough water to submerge the dumplings. Let it boil until the sugar dissolves in the water. Check the sweetness at this stage. We are not looking for thick sugar syrup consistency but normal light sugar water.

8. Slowly, slide the dumplings into the sugar water. Make sure they have enough space to expand later. Cover the pan for 5 minutes. Let it cook in the sugar water for another 5 to 10 minutes. The texture of the dumplings will improve the next day, so I advice you to eat after chilling for at least 4 hours. Since this dumpling is made of milk, it has to be consumed within two to three days. 


Happy Cooking


-Abby


Monday, 8 June 2015

Moist Banana Cake

This is a very moist and buttery kind of cake. An excellent treat for evening tea or morning breakfast. Well, extra fat and sugar will definitely require you to spend more hours in gym to burn those stubborn fat but it's okay, when taken in moderation or once in a blue moon. Enjoy!

Moist Banana Cake

Ingredients : 


Pillsbury Atta Flour or Chapati flour : 1 cup plus 1 tbsp
Brown castor sugar : 1/4 cup
Mashed ripened bananas : 1 cup
unsalted butter : 125 gm
Vanilla essence : 1 tsp
Eggs (Grade B) : 2
Fresh unsweetened thick milk : 2 tbsp
Baking powder : 1/2 tsp
Baking soda  :  1/2 tsp
Salt : 1/4 tsp

Method :


1. Leave the butter and eggs be at room temperature before we start the baking process.
2. Now, using a hand mixer cream the softened butter and castor sugar till pale colour and without the specks of sugar.

3. Gradually add beaten eggs little by little by beating simultaneously. Do not add eggs all at the same time as it will curdle butter mixture.

4. Mix dry ingredients such as flour, leavening agents and salt. Sieve them thrice.

5. You may start adding mashed banana alternated by flour mixture. Mix it well. This time vanilla essence and milk can be incorporated.

6. Pour the batter in a baking pan and tap it lightly on the ground twice to even the top.

7. Bake at 180 degree Celsius for 40 minutes or till you get a nice brown spot on top and when inserted with a skewer, it comes out clean. Then, the cake is baked well. 

8. Leave the cake on a rack before cutting into slices.


-Abby

Spicy Vegetable Biryani

  Spicy Vegetable Biryani INGREDIENTS :  Basmati or Seeraga Samba rice - 2 cups Water - 3 1/2 cups Oil - 3 tablespoons Ghee - 2  teaspoons C...